Control Software

My entire show is controlled by a computer. I use a software called xLights to control all of my lights. In this software, I create a virtual model of every single prop and string of lights in my display.
Sequencing

Every single time you see a string of lights blink or change color, I have to program my computer to turn it on at the correct time. This is called sequencing. I do this by clicking and dragging to fill in little boxes on a grid. There is a row for each item in my show and each column stands for a certain amount of time.
Preview

While I create sequences for my show, I can watch an animated preview of what the light show will look like. This helps me to make sure that my sequences look as good as they can during the show!
Scheduling

The scheduler is part of the xLights software, and it’s what actually controls my show once all my sequences are ready. It allows me to select which sequences to play in each show, and put them in the order that I choose. It also allows me to trigger certain events in my show from external commands, for example when you trigger the snow machine from my website.
Audio

When the scheduler runs a show, it sends the audio to my radio transmitter (left) so that you can listen to the music in your car, as well as the amplifier (right) for the speaker in my yard.
Control Signal

My show runs at 40 FPS, or frames per second. This means that every single second, my computer sends 40 instructions, or commands, for each string of lights telling them what to do. That is a total of about 20,480 commands per second! The scheduler on my computer sends all of these commands to this box, called a DMX adapter. It converts the commands into a form that can be sent a long distance into my yard.
Controllers
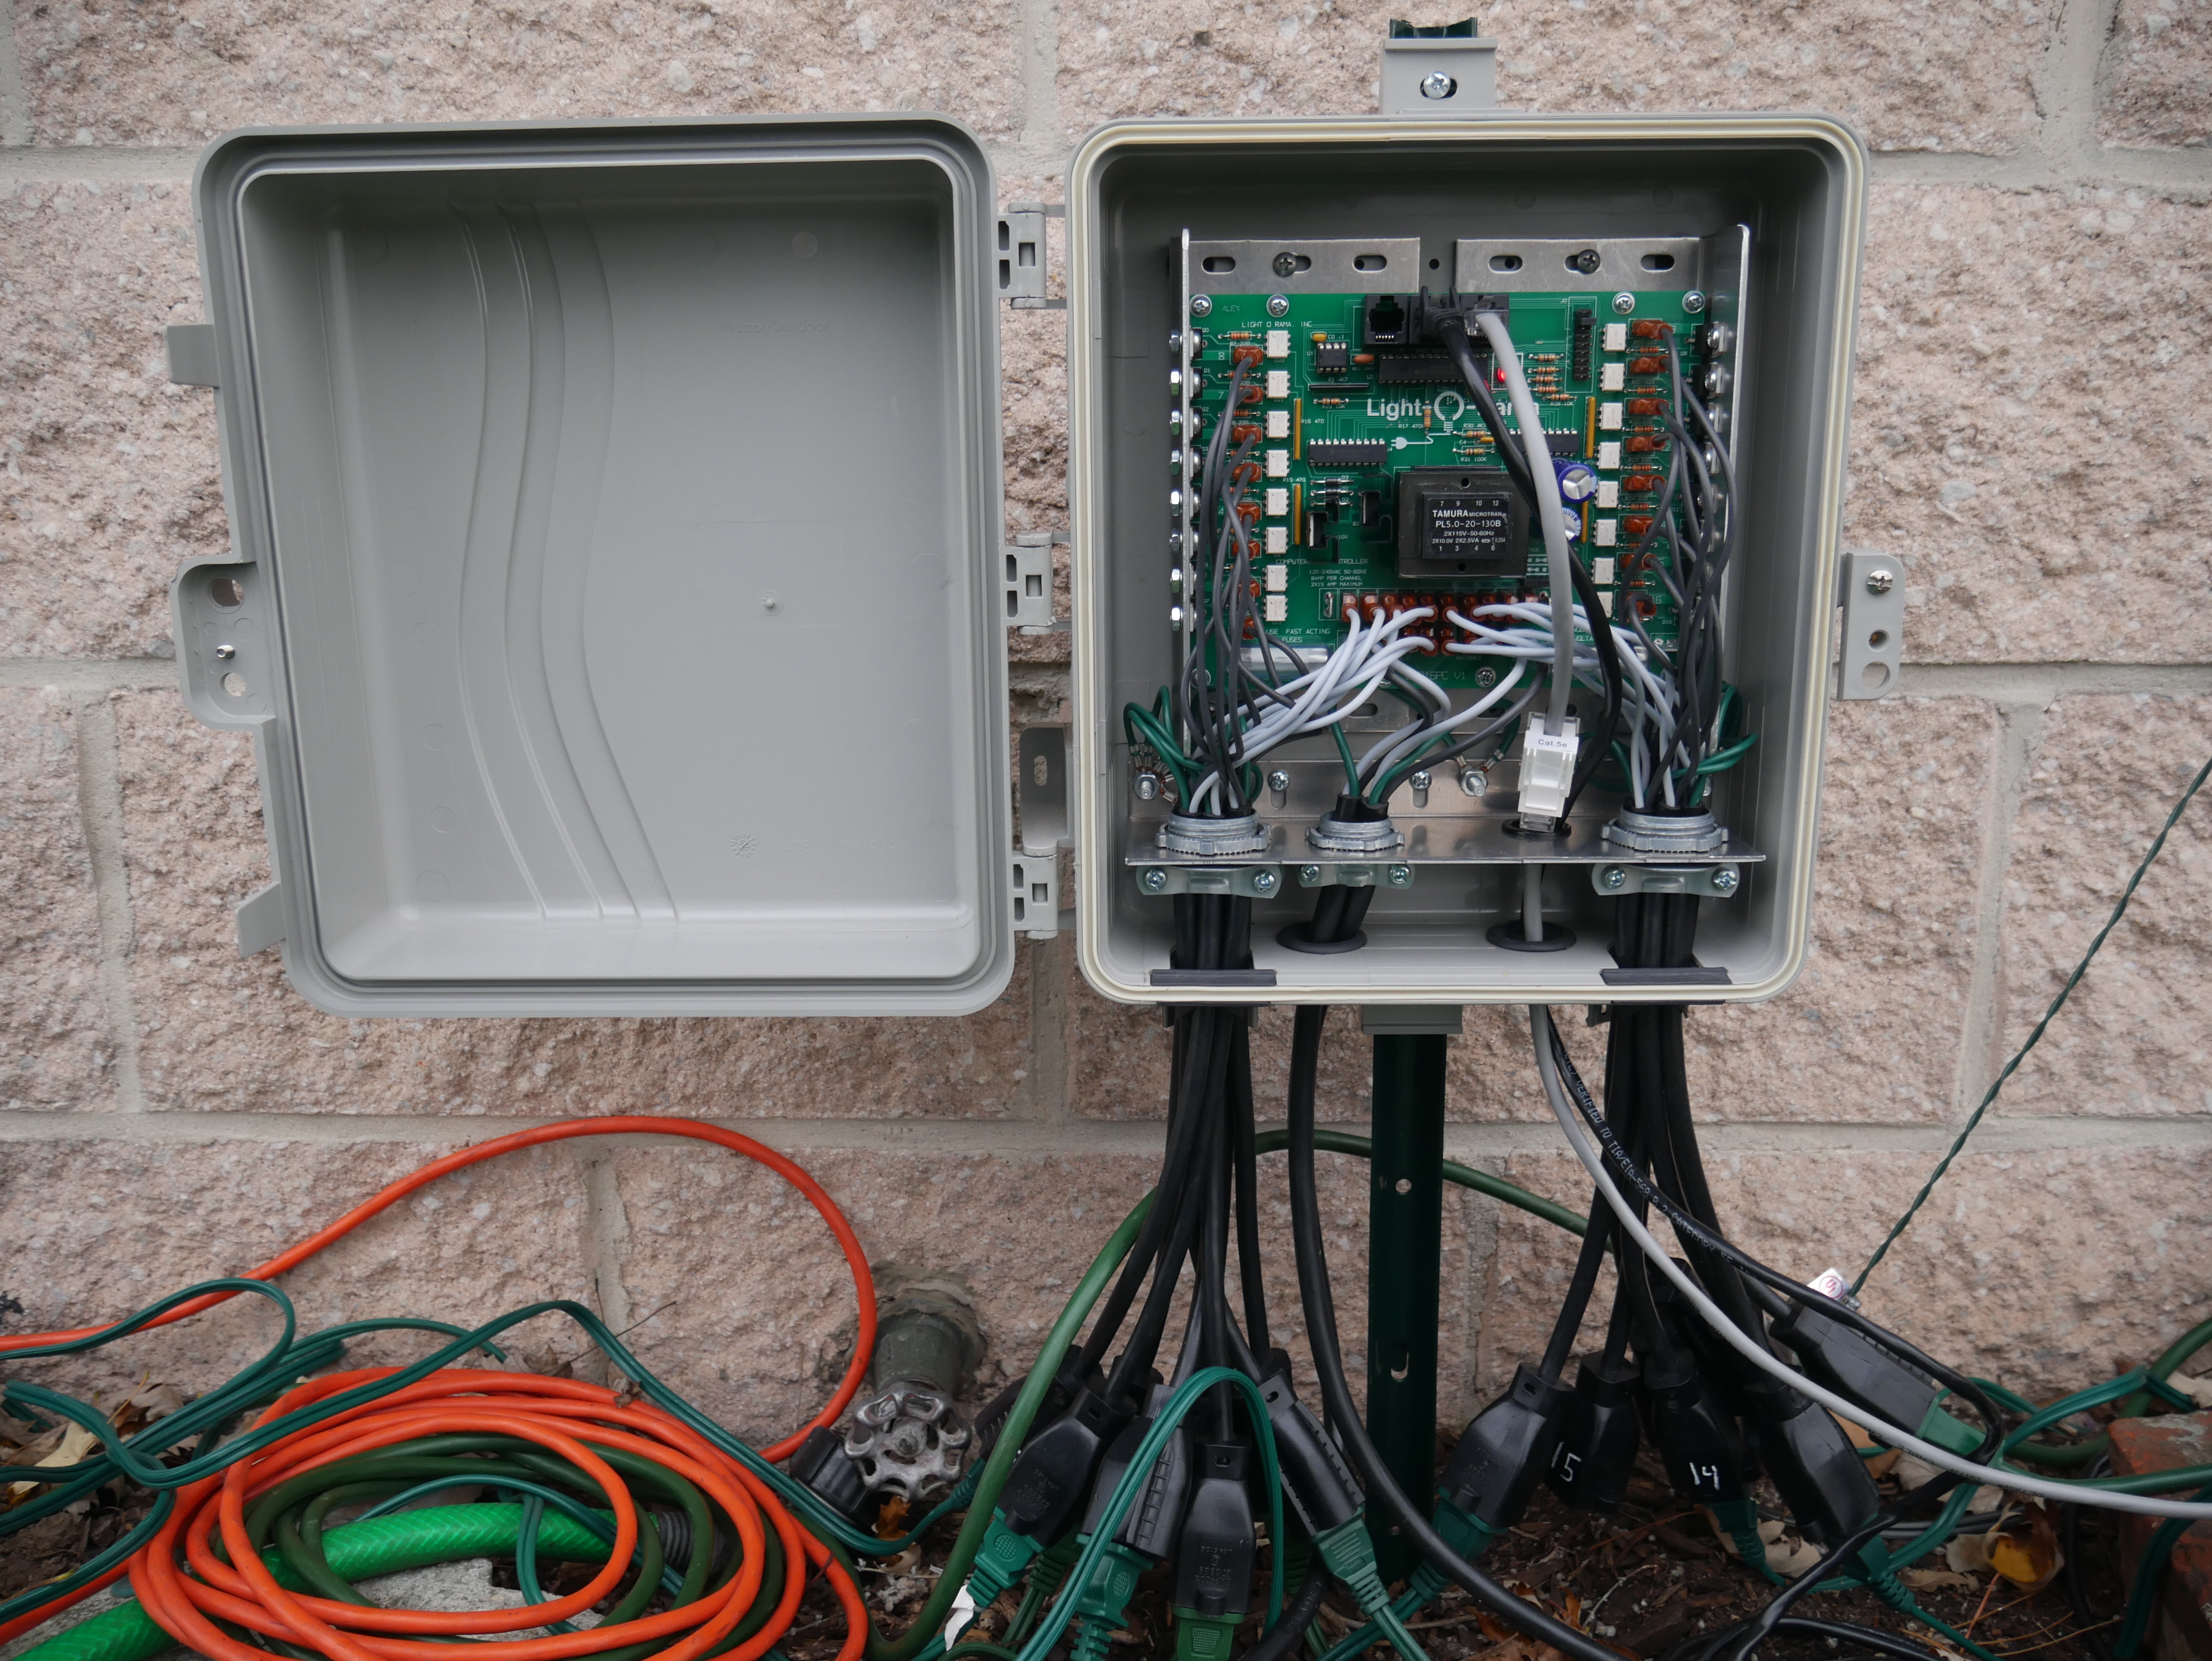
The cable that carries all the commands from inside goes into one of these controllers, and then it goes back out and into the next. This is called daisy-chaining. The controllers are what actually switch the lights on and off. They receive the commands from my computer and follow the commands for turning lights on and off, as well as dimming. Each controller can control up to 16 individual strings of lights. The lights plug into the cords that come out of the bottom.
Set-Up

About 3 weeks before light-up night, it’s time for all of us to get busy hanging lights and setting up props!
Mega Tree

The big tree on the right of my show is called a mega tree. There is a pole in the middle that all of the lights hang off of, which is held upright with 4 ropes going to the ground. It consists of 11 strings of lights, 5 blue and 6 red, with one end hanging from the top of the pole and the other end attached to a stake in the ground. Then, a string of rope lights are wrapped around the pole and a star is mounted on the top.
Driveway Arches

The giant arches over the driveway are made of plastic pipe bent over the driveway. Each end is attached to a stake in the ground to keep it bent. When straight, each arch is 30 feet long! There is another pipe that runs between the very top of all the arches to keep them connected, and then it is anchored to the house to keep them from bending in the wind. To learn more about how the arches are made, check out this video.
Extension Cords

I try to put my controllers as close as possible to the lights they are controlling, but it still takes about 450 feet of extension cords to connect all the lights!
Snow Machine

The snow that comes from my snow machine is not real snow, it is actually small clumps of bubbles! It soaks a fabric “sock” with soapy water, which is stored in a large bucket under the snow machine, and blows air through it to create lots of tiny bubbles. More air blows across the outside of the sock blowing the bubbles off in little clumps that look like snow! For more information about the snow machine, check out this video.